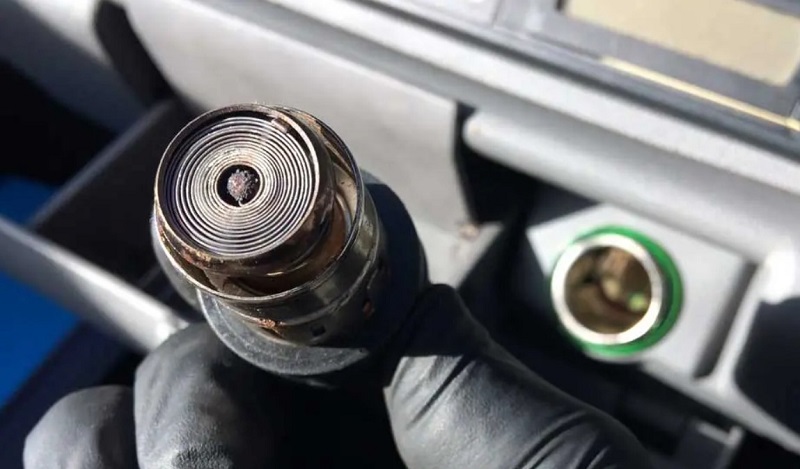
If your cigarette lighter socket is not working, you have a very inconvenient problem and need to know how to clean it so that it functions the way it is supposed to. Today, only about 14% of U.S. adults still smoke cigarettes. That is why very few newer cars come equipped with an actual cigarette lighter. Oh, there are still those 12V DC outlets in cars, usually more than one, but now they are considered “power outlets” for operating and charging things like cell phones, laptop computers, GPS devices, and dash cams. Or maybe you are one of those 14% that still use that outlet for what it was designed for, to light a cigarette.
Why Is the Cigarette Lighter Not Working
There could be several reasons that the socket isn’t working. It could be that the fuse has blown. It could be a result of a child inserting something into it. Usually, the things that are causing the socket not to work are dirt, burnt tobacco, and/or corrosion that prevent the electrical contacts from working properly.
How to Get the Socket Working Again

Getting the cigarette lighter socket to work again involves a simple process of elimination to determine the real problem. Here’s how to begin the process:
First Step: Make sure there are no foreign objects stuck inside the lighter socket. Children love to play with things and plug things in where they don’t belong, especially when you are not looking. It could be a small toy or a piece of debris, like a piece of leftover food or a paper clip. If you can see something stuck inside the socket, don’t use a metal object like a screwdriver to attempt to remove it. Using something metal could cause the fuse to blow or cause you to get shocked. If any corrosion can be seen you can probably skip ahead to Step 3.
Second Step: Check for power at the socket. One simple tool to check this with is a voltage meter, sometimes called a multimeter. There are voltage meters that plug directly into the lighter socket with a plug that is exactly like the plug on an automotive phone charger. These testers will display the voltage on an LCD screen, and they are easy to use and understand. You can pick one of these testers up for under $13 at most automotive parts stores or on Amazon. A good reading on your cigarette lighter socket should be 12-14 volts. If the reading is zero, you probably have a blown fuse or a disconnected wire.
Third Step: If there are no foreign objects present and there is power to the socket, cleaning corrosion in the socket will probably do the trick. Make sure the car key is turned to the off position, and it would be a good idea to remove the fuse. Sprinkle some ordinary baking soda into the socket. Then use a cotton swab that has been lightly soaked with white vinegar and gently rub it around inside the socket to agitate the baking soda. The baking soda and vinegar will chemically react and begin to dissolve rust and corrosion. It should take about 10 minutes to do the job, depending on the level of corrosion present. After 10 minutes, use a cloth dampened with water to remove any residue. You may have to repeat this process if any residue or corrosion remains.

If using homemade concoctions isn’t your thing, you could try using one of the many automotive electronic contact cleaners that are on the market. CRC makes a good electronic cleaner, “QD Electronic Cleaner”. Another manufacturer of these types of cleaners is Craig Laboratories. Their “G100L-2DB” is another good choice. You may have to use a small pick or screwdriver to remove any corrosion after allowing the cleaner to dwell a short time. Again, depending on the amount of corrosion, you may have to repeat this process.
This is a good YouTube video you can watch that briefly describes the cleaning process.
Although it demonstrates how to clean an electrical connector, the same technique will work on a cigarette lighter socket or any other DC auto socket that your car may have.
