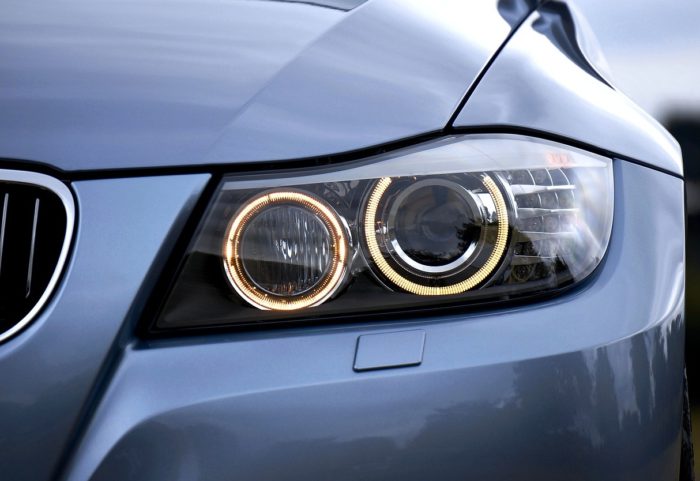
Your headlights are like the punching bag of your car. Everywhere you drive, park, and store your vehicle; the headlights are the first to get hit by all the debris. Today we are going to show you how to clean plastic headlights with household items.
The best way to clean and protect your headlights is with commercial headlight cleaners and restorers. Unfortunately, most of us don’t just have those lying around the house just waiting for a nice cleaning job. For those times that you need a quick, but effective, clean try out these car care hacks that will help you get the road trip slime off the lights and bring back the brightness.
Why Do I Need to Clean My Headlights?
Your average drive around town will show reveal that not many people care to take the time to show their headlights some TLC. If most people don’t dedicate the time to shine, then why should you?
See the Road
The first and most important reason to care for your headlights is safety. I know you don’t want a lecture on safety, but dirty headlights mean that the visibility provided by those front-end torches diminishes. Every layer of dirt and grime makes your lights less effective at night, in fog, and in stormy weather.
Look Good
Ok, lecture over. If safety isn’t enough motivation, let’s go for looks. The headlights of your car can make or break how beautiful your ride looks. Think of your headlights like the eyes of a supermodel. The rest of her may look positively heavenly, but if her eyes look like clown makeup, they kind of ruins the whole picture. By cleaning and treating your headlights, you make sure that the headlights allow the rest of your car to shine.
As my old granny used to say, “you may be ugly, but you got eyes that melt a woman’s heart.” Even the oldest and ugliest of cars can glow like a diamond with well-treated headlights.
Methods for How to Clean Plastic Headlights with Household Items
Now that you have a little motivation to apply some elbow grease to your front-end let’s go over a few household items that will let you achieve an awesome shine (>>> Check our guide about rims cleaning with household products too).
Dish Soap
 The first hack on the list is the same stuff you use to clean up your pans after Sunday dinner with the family. The detergents under your kitchen sink have the power to remove the ugliest and thickest greases from all your dishes.
You can make use of this same ability to strip away the built-up road grime that has accumulated on the surface of your headlights. Using dish soap is a fast and effective way to keep the daily wear minimal. All you need is some warm water and a lint-free cloth or sponge, and you have yourself clean headlights.
Experts recommend that you clean the headlights by making small circles across the surface the lights. A sponge can give you the extra scrubbing power you may need to get rid of splattered bugs or mud. We recommend using a mild detergent that won’t damage your paint.
A trick to help limit the amount of hard scrubbing is to soak your headlights with warm water before you apply the soap and sponge. You can also add a little bit of salt to the mix to make it a little more abrasive to scrub off those tough, sticky messes.
After cleaning, rinse away the excess soap suds and dry the headlights with a soft, microfiber cloth. Using microfiber is the best way to make sure that you cause any scratching or damage to the surface of the headlights.
Baking Soda
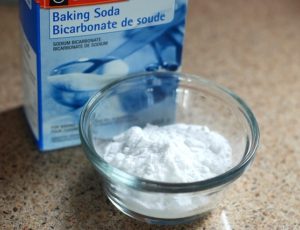 We love baking soda as a cleaner. This common kitchen ingredient is inexpensive and powerful. The bubbling power creates a foaming action that digs deep below the surface of set in stains and grime to make your headlights look beautiful.
To take advantage of the cleansing abilities of baking soda, mix warm water and baking soda in a bowl. Mix to form a cleaner with a consistency of paste. You use the baking soda paste to coat the headlights. The natural properties will act as a cleanser that draws out the impurities that cause yellowing of the headlight plastic.
You want to make sure you clean the headlights before applying the paste. Insect remains, and road grime will prevent the baking soda from penetrating and treating the surface. Use your microfiber cloth to cleanse and remove the paste. The inexpensive nature of baking soda makes it ideal for coating and polishing the headlights as often as needed. If one coating doesn’t give you the shine you want, apply another. Repeat until you get your desired result.
Pro tip: Place painters’ tape around the edge of the headlights to prevent the baking soda from contacting your car’s paint. Baking soda is abrasive and can ruin the paint around your headlights.
Toothpaste
Whiter teeth and brighter headlights, who knew? The same cleaners found in toothpaste that helps remove food and drink stains will also remove staining and build-up from your headlights.
Using the toothpaste is as easy as apply and rub off. Start in the middle of the headlights and move outward in a circular motion. This motion will make sure you clear all the residue away from the headlights as you clean. As with the other methods use a soft sponge or microfiber cloth to prevent damage to the headlights.
White Vinegar
Our final method is a little more advanced than the previous three. Using white vinegar requires the removal of the headlight lens cover ( >>> Check this guide about cleaning inside of headlights) and soaking it in a solution. Using a bucket or deep bowl, you need to submerge the headlight cover in the vinegar for about an hour. Vinegar is a natural acid that is tough enough to strip away grime and caked on debris, but gentle, so it doesn’t damage the headlight cover.
After the hour-long vinegar bath, use a rough sponge to remove the vinegar and the leftover much. Dry off the cover with a microfiber towel and reinstall to finish the job.
Bonus: After the vinegar bath, coat the headlight cover in cooking spray. The spray acts as a natural polish. Use your handy microfiber cloth to buff the headlight to a shine. The spray will also help to reduce the appearance of scratches and protect the headlight during future road trips.